Posts in Gear

Moog Voyager XL


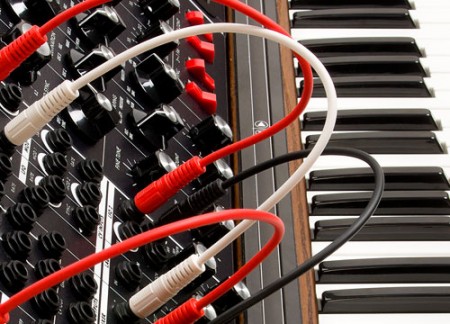
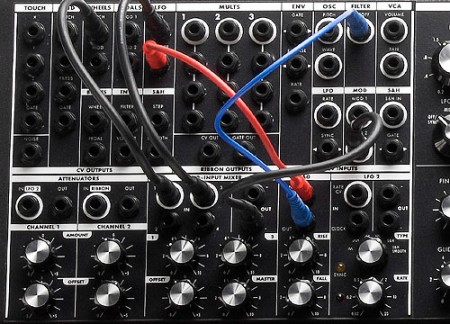
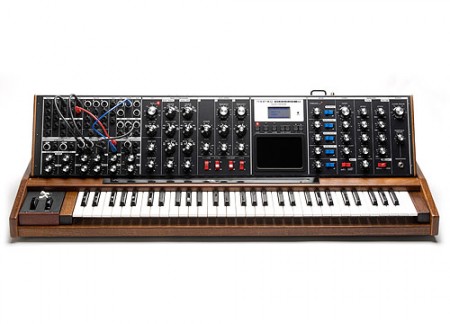
Moog just announced the new XL version of their Voyager synth. This is pretty exciting news considering the dearth of manufacturers these days willing to go out on a limb with a fully analog design. When I first saw the press shots I was really hoping it was going to be polyphonic, a modern Memorymoog maybe. But after checking the specs I was disappointed to learn that it’s just a mono synth like it’s Voyager brethren. What was even more disappointing was the price: $5,000 USD. While this is a beautiful piece of equipment and I appreciate the fact that they are produced on a small scale, that just seems like a lot for a larger — albeit still mono — Voyager with VX and CV tacked on. From what I can tell the same functionality could be had by getting a Voyager Rack and the expander boxes.

Also like the previous Voyagers, it’s pretty much in line visually with the original Model D design cues, which I adore. But I have a Voyager Rack and have always been disappointed by the body. The original Minimoogs had an incredible paint job and color scheme. Even the typography was amazing. The new stuff has a big sticker for the interface, as opposed to being screened directly on to the metal. It’s details like this that can really undercut an otherwise quality design. That being said, I’d have to say it’s still one of the prettiest synths out there, save for the Virus TI2 of course.

At any rate it’s still one of the most beautiful sounding musical instruments that you’ll ever hear.

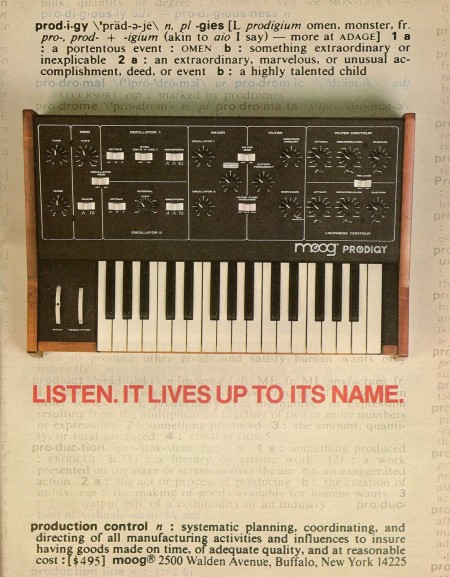
And here are a couple of vintage Moog ads for good measure.


TMA-1 Headphones Giveaway


Thanks to The Ghostly Store and AIAIAI, we’ve got a pair of the beautiful TMA-1 Heaphones to give away. Enter to win in the comments by telling us your favorite song or artist we’ve posted on the blog this year. Be sure to leave a valid email in the “email” field so we can contact you if you win. Winner will be announced this week. Enter here

If you’re not feeling particularly lucky today, or just don’t want to wait, The Ghostly Store has special pre-order pricing on the TMA-1 now through August 10th. Check it out!

More about the TMA-1 Heaphones in this video:

Studio 1.0


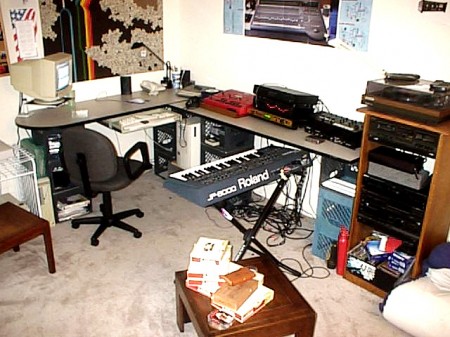
We’ve had the “Random Nostalgia” category on this blog for a while, but I think this is the first time a post has truly fit the bill. I was searching around my hard drive last night and stumbled upon this gem from my past, the photo you see above (sorry for the poor quality, I can’t find the original photo I scanned this from). I’m not quite sure, but this is probably from sometime around mid-1999 in Sacramento. This was the firs time I assembled what I would consider a proper studio, although it was just my bedroom (you can see the futon folded up in the right corner). I think before this I had a Roland MC-303 and SP-202 set up on a dresser in the corner so this was a big step up from that. This was also when I started using a computer to record; I had previously recorded everything into an ASR-X Pro sampler which could handle about 6 minutes of audio. I would then record the outputs of that to Minidiscs (still have a huge box of those I need to sift through).

This was before I really started designing but if you look closely you can catch one of my very early visual influences on the left wall. I rescued that tapestry thing from a dumpster; it depicts a waterfall made of rainbows. Pretty bad I know, but looking back I realize that color scheme and subject matter informed a lot of my earlier work. Not sure what happened to it, must have lost it in a subsequent move. The same goes for the other stuff, the only things I still have around are the computer keyboard, the grey box in the stereo cabinet and the wooden table in the foreground. I gave the keyboard stand to Dusty Brown and I saw it at the show in Sacramento this weekend, nice to know it’s still alive and well with the same Renthal sticker on it. As for the other stuff, it was either sold on eBay or junked (the milk crates that are holding up the desk, for example). Here’s a kit list of what I can make out from the picture:

– ASRX-Pro Sampler / Sound Module. Used this to make Science of Patterns a few years later.
– Roland JP-8000 Synthesizer.
– E-MU Orbit Sound Module (don’t ask why I owned this)
– Yamaha Stereo EQ
– Gemini 4-channel DJ mixer
– Sony MD recorder

Crazy story about the JP-8000, I put it on eBay about a year after this shot was taken. The winner of the auction was from the area so he came out to pick it up. It turned out to be Shaun Lopez, we ended up becoming friends and he still does mixing work on my tracks today (Daydream, Adrift, Disconnect to name a few).

iLemur


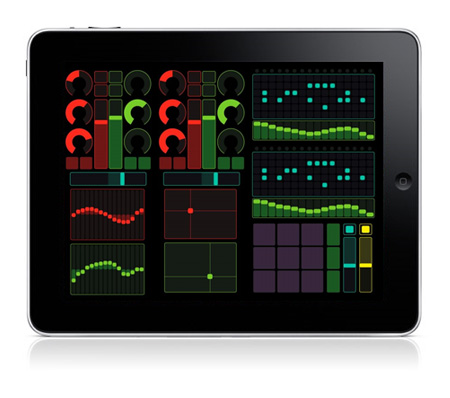
If you produce music or do any DJ/VJing you may have heard of the Lemur, a touchscreen device that allows you to design custom controller interfaces and transmit via OSC. I’ve always wanted one and it’s the first thing I thought of when they announced the iPad today. At $500 it would be a great deal compared to the Lemur’s nearly $2000 price point. You’d just need software and I assume the guys over at TouchOSC already have something cooking. (I used the TouchOSC interface elements to make the mock-up above)

All you musicians, DJs, and VJs out there: Would you buy an iPad to use it as a multi-touch controller? (Comment) I think it would make a great DAW controller, kind of like a customizable MCU or Tranzport. I guess the main issue would be the interface, I don’t really know if the OSC over WiFi would cut it as far as latency is concerned.

Now if there were just a Photoshop to OSC plugin, you could be running a custom interface via touchscreen.

Herman Miller Embody Review


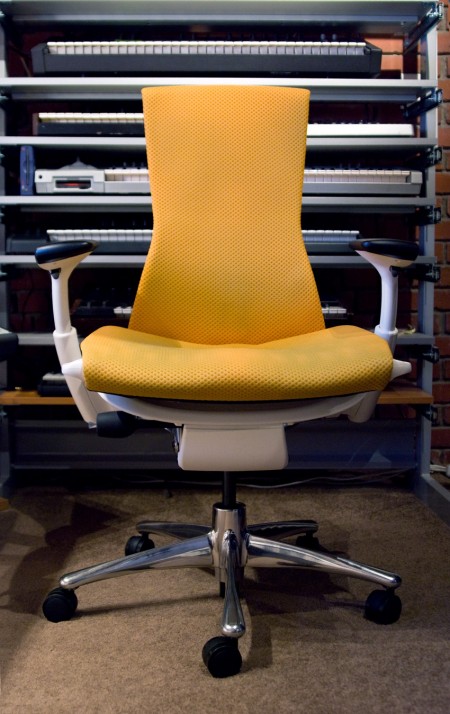
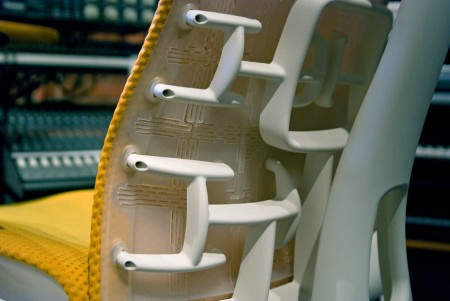
It’s been about 4 months now since I was able to get my hands on the Embody — Herman Miller’s latest flagship work chair — and now I feel like I’ve spent enough time in it to give a proper review. The Embody seems to be the logical successor to the throne of the ubiquitous Aeron chair and I have to say it’s a worthy one. I’ve had various repetitive stress related injuries throughout the course of my career so I’ve always been very sensitive to ergonomics. I’ve had Aerons and various other chairs but I’ve never really been truly satisfied with any of them. So it was with a healthy dose of skepticism that I approached my experience with the Embody.

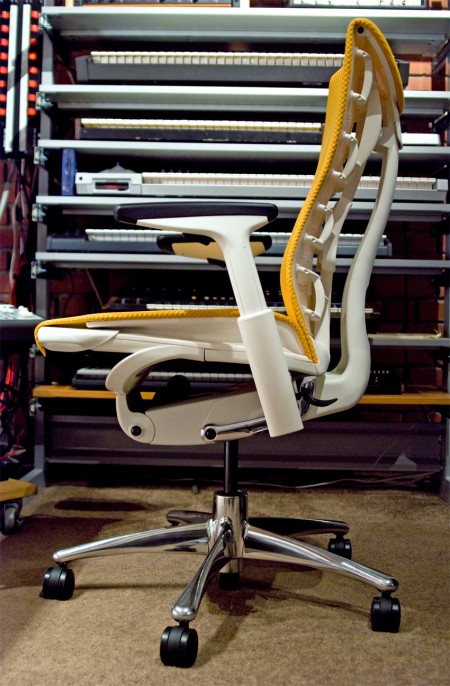
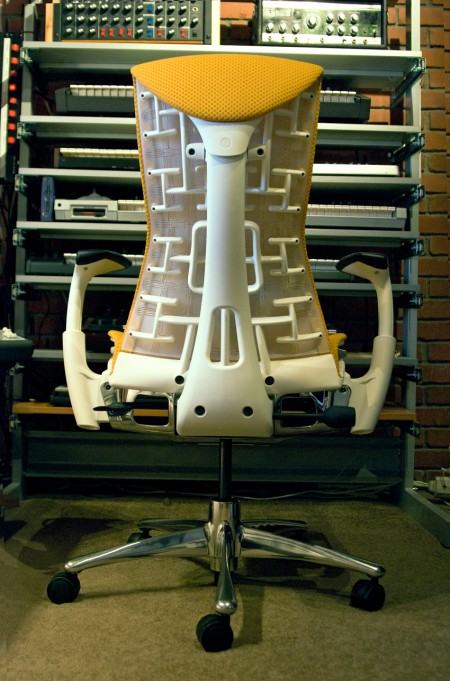
Before I got the Embody, I had a hard time finding any definitive information as to whether it did in fact live up to the initial hype surrounding it’s release. I guess chairs are pretty subjective, there’s never really a one size fits all solution. I heard a lot of people debating whether it was better than the Aeron and Humanscale’s Freedom Chair, and still more debating whether it was worth the decidedly high price point. But everything I had read pretty much went out the window when I sat in the Embody. It really is as incredible chair, it’s the first one I’ve had that I’m not constantly aware of. It acts almost as an extension of your body allowing for much longer periods of sitting without the common issues I’ve had with most chairs in the past. The unique seat back isn’t just there for looks, it does wonders for my back which was usually the biggest issue when working for extended periods. The arms are very flexible and can be easily dialed in for a perfect height which goes a long way to alleviate wrist pain issues. All in all, the fit and feel are top notch and honestly like nothing I’ve ever experienced. The bottom line is that this chair allows me to work longer and focus better. And the Embody is definitely a step up from the Aeron and light years beyond the Freedom Chair (which I really don’t like at all) or the Mirra (which many recommended as a cheaper alternative to the Embody).

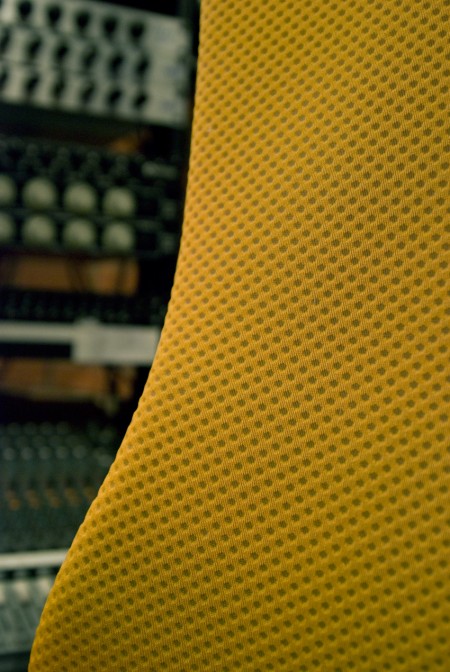
As much as I love the Embody I do have a few issues with it, none are deal breakers for me, but you should be aware of them if this chair is on your short-list. First up is the design. Yes, I ordered the orange/white which in retrospect was a mistake. It can really overwhelm the space visually. The chair is also rather large so between that and the color, it certainly is a presence in the room. I have since seen the black on black version which is much more subtle and highly recommended. Second is the mobility of the chair. In the studio I have to move around from station to station a lot and the sheer weight of the Embody makes this difficult. The thing is build like a tank which is great for durability, but it’s not a chair you’re going to be gliding around the office in. Or course, this would be less of an issue on hard surfaces, but the downstairs at the studio is carpeted and you almost have to get out of the seat to move it around. I do have the optional chrome base and I would imagine the standard plastic base is a bit lighter. Finally, at around $1100 (which is at least better than the insane introductory price of $1700 and can be much less with an industry discount, see below) it is prohibitively expensive. But as they say, “buy it nice or buy it twice”. As someone who makes a living sitting in a chair all day it’s not hard to justify spending a chunk of that living on a high quality chair. It allows me to get more work done and avoid injuries that in the past would put me out for a while making it well worth the premium.

All things considered the Embody is a huge winner in my book. It’s the most comfortable and functional chair I’ve ever used and will be in my studio for a very long time.

I am told that discounts are available on the chair through Herman Miller. I got mine direct and at the time they had a promo deal going on that brought the price down to $800 fully loaded. You might try contacting them directly to find out whether they have any promotions going on or whether you can get a designer discount.

Christmas = Linn Sondek LP12

Sondek_LP12_Retro
LP12_SE_FINAL_e-brochure-4 copys
linnkeelmain
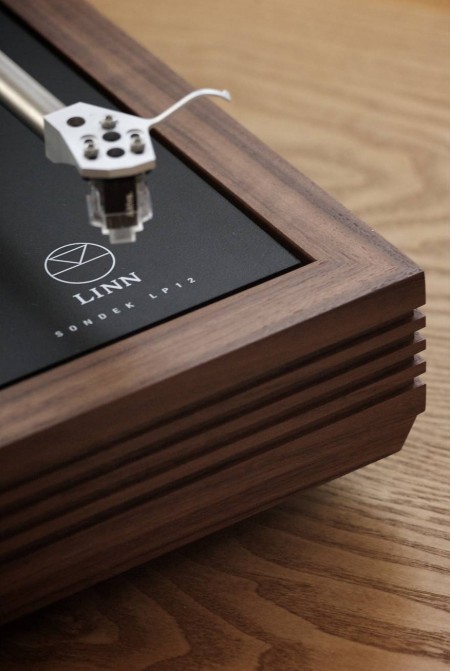
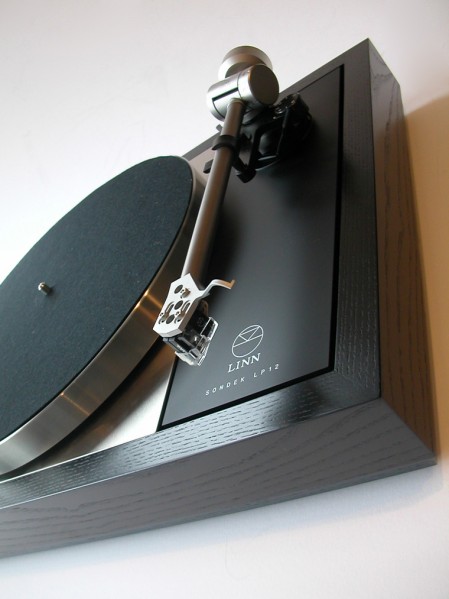
Every year around this time I like to pretend I have a rich uncle or something and then think about what they would get me for Christmas. This year rich uncle would get me a Linn Sondek Limited Edition Retro LP12 with the walnut finish. I’ve been thinking a lot about home stereos lately, I really want to build a solid system for listening. For a long time I’ve lived by a rule that I’d only spend money on things related to making music or graphic design. This means I have a great set of monitors in the studio, but in my living room I listen to music on a $200 set of Logitech speakers. For some reason I never really thought about how ridiculous this was, especially considering how much enjoyment I get out of listening to music.

So I was walking down Market street the other day and stumbled in to San Francisco Stereo & Theater Systems where they had a pair of B&W 683’s on the floor. I plugged in my iPhone (I know, MP3 is not worthy of a hi-fi system, but it’s all I had), cued up Beyond the Wizard’s Sleeve’s rendition of Midlake’s Roscoe and proceeded to melt into the seat. I’ve never heard sound like this. Yes, I have Adam’s in the studio, but that’s a near-field system designed for professional use. They’re meant to sound very flat and honest, they’re not necessarily supposed to sound pretty and warm and they’re certainly not designed to fill up a large room.

So this all got me thinking, I need to build a proper hi-fi. I have an old (but powerful) Denon hand-me-down amp in storage that I could dust off, just add some B&W’s and I’m set. But then I started thinking that I couldn’t bring myself to play MP3’s through a system like that so I would have to start rebuilding my music collection based on FLAC and WAV, which could take some time. Finally I realized this would still involve D/A conversion at some stage (which I was thinking could be handled by a spare MOTU 828MKII) so it still wouldn’t be ideal. This is when it finally occurred to me that I need to get a proper turntable and expand my vinyl collection.

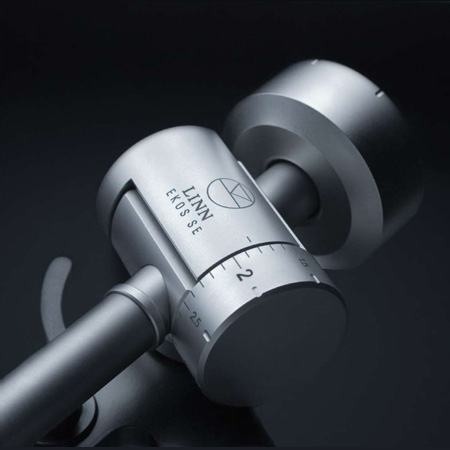
Enter the Linn Sondek LP12, which apparently sounds incredible and — as you can see from the photos above — is absolutely gorgeous. Unfortunately it’s about $2500 so it’s never going to happen. There’s got to be some less expensive alternatives out there, guess I’ll have to dig around a little. At any rate, if my long-lost, wealthy second cousin is reading this, you can ship it all direct or I’ll take a personal check.

Rimowa Salsa Camper Edition

camper-rimowa-salsa-series-1
camper-rimowa-salsa-series-2
camper-rimowa-salsa-series-3
camper-rimowa-salsa-series-4
camper-rimowa-salsa-series-5
I’m always looking for ways to make traveling easier; it’s a chore lugging heavy gear around airports and trying to scam your way onto planes with oversized, overweight “carry-ons” to avoid checked overage fees. I currently use a custom ATA flight case — which I check — for carrying prints, and an SKB 3I-2011 carry-on for music equipment. I really like the SKB but it’s just a little smaller than I need it to be and sort of cumbersome to wheel around.

Over the years I keep seeing the 4 wheeled roller suitcases here and there — particularly in Tokyo where it seemed like everyone had them. The 4 wheel concept seems great for getting around the apparently the cases are very light (and strong), leaving plenty of overhead to make it under the magic 50 lb. check barrier. On my recent trip to Toronto I finally was able to catch the brand name of one of the nicer ones I’ve seen, the German-man Rimowa. I jotted it down and did a search when I got home. The more I looked into these cases the more I was amazed at the build quality and aesthetics. Unfortunately they’re ridiculously expensive — $1000 for the carry-on model I want — so I’ll be sticking with my humble SKB for the time being.

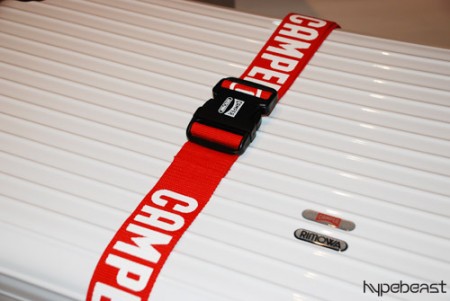
During my search I came across this post on Hypebeast about the limted edition (30!) Camper Rimowa Salsa and was in severe gear-lust mode to say the least. This thing is beautiful, fully appointed with custom strap and everything.

Rimowa also happens to have a pretty interesting Flash-based site (which weighs just about as heavily on your bandwidth as their products do on your wallet). I rarely find Flash-based manufacturer sites like this of any use (in fact I loathe them most of the time, opting to browse via HTML on a retailer’s site instead) but Rimowa’s is pretty slick and actually rather functional. Seeing the models standing by the cases is a clever way to quickly gauge their relative sizes.

You’ll find some more interesting shots of various Rimowas here.

Drew Gardner + Phase One

PhaseOneCamra-copy
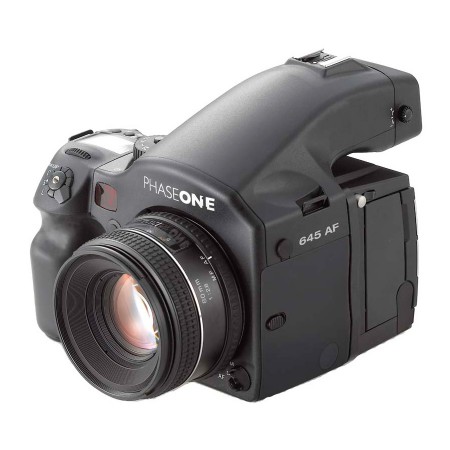
Whenever I see images like the ones below by Drew Gardner, I always ask myself how the hell they do it. Apparently they do it with $36,000 cameras. That’s not to say it’s all about the equipment, but 39 mega pixels doesn’t hurt. The Phase One camera system seems pretty incredible: a medium format, full-frame sensor that can produce “Noise-free exposures of up to an hour”. Crazy…

Artistically Gardner’s work (examples below) isn’t really my style, but technically it always amazes me that people can create images like this. The Strobist recently mentioned Gardner and his Phase One Masterclass. At $2,850 I won’t be attending anytime soon, but it would be great to see the process of someone who has mastered photography on this level.

dgalpaca
dgpara
ele2

Here’s a peek at Gardner’s process in his “Epic Location Photography” trailer:
httpvhd://www.youtube.com/watch?v=K_MXwLxwrCc

Sony DPS-R7 Reverb DOA

iso50-dspr7
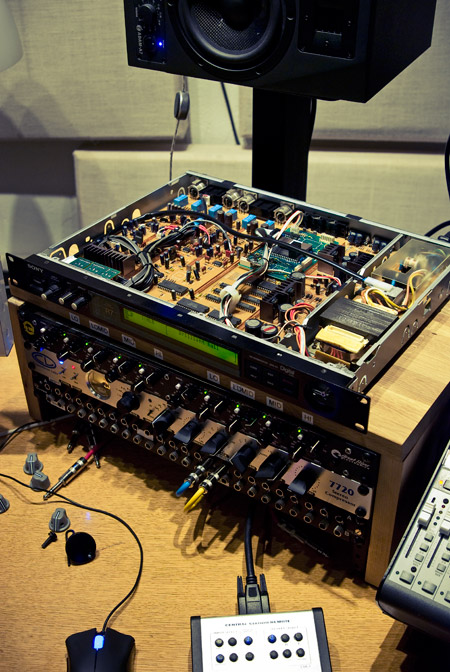
My Sony R7 Reverb from eBay came today, dead. I replaced a dead battery tonight but that didn’t clear anything up, still just passing a dry signal and a dead rotary encoder knob. Not sure what the issue is, if anyone knows a good Sony tech let me know, I have the schematics. Also need a good Lexicon tech too.

Mastering Tycho At Monsterlab

mlmain
ml1
mlpano
I made the drive out to Sacramento this morning to have the next Tycho single mastered by Eric Broyhill at Monster Lab Audio. In case this is sounding familiar to you, it’s because this is my second pass at this song. I mixed and mastered it last month but after repeated listens, something just wasn’t quite right so I did another mix over the past week and it’s finally wrapped. It’s been a long road, this particular track is sonically very dense and it’s been a very difficult one to mix. For those of you who aren’t familiar with the idea of mastering, it’s the last stage in the production process in which an engineer puts the finishing touches on your music and gets it into the form it will take for the final release — be it CD, MP3, vinyl, or otherwise. That is, of course, a gross oversimplification of what mastering is, if you’re really interested in the details here’s the Wiki article on the subject. It’s a vital step in the process of moving a recording out of your studio and into the real world where every stereo and every room is different, and you hope that your music sounds good on and in all of them. I think most importantly it puts another set of critical ears on your music. By the end of the production process your own ears can become deaf to the subtleties (or not-so-subtleties) and details of the material so it’s vital to have some fresh ears hear it for the first time and recognize it for what it is, not what it has become for you through infinite listens. Ideally, those ears belong to a capable person who knows waaaay more than you’ll ever know about the science and nuance behind how people perceive sound. Mastering can be heavy-handed or light and transparent, and therein lies the problem. Because the process can have such a profound effect on the final product, you have to trust the person doing it. You must have faith that they get what you’re trying to do with a song. It’s a very difficult thing to hand over the reigns to something you’ve put so much of yourself into, to another person who may or may not understand the essence of what you’re trying to do sonically with a song.

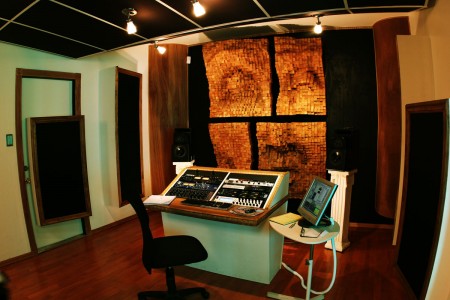
I was fortunate enough to meet Eric Broyhill back when I was finishing up my first album and he’s mastered all of my releases since. He’s great at understanding what I am going for and I am always amazed at the night-and-day results when I compare his versions with the raw material. The shots above are from his space which is located inside Hangar Studios (John Baccigaluppi’s studio and the home of TapeOp magazine) in Sacramento. I took these shots during a session a while back so they aren’t really up to date, I think he’s replaced a few pieces in the rack but the interiors are the same and that’s the really impressive thing about the place (unless you’re like me and you can’t stop staring at the Manley Massive Passive). A mastering environment has to be acoustically treated to ensure accurate monitoring of the material. There are many ways to go about this, most involve fiber sound absorbers and diffusers. I’ve always admired Eric’s solution to these problems from both a technical and aesthetic perspective. He was able to build much of the treatments into the structure so that they’re almost unnoticeable but the most prominent element is definitely meant to be noticed. The primary diffuser on the front wall is a giant face he had built by a local artist out of wood blocks set at varying heights (see picture above). This randomly redirects reflected sound waves to avoid phasing issues that can be caused by parallel surfaces. It looks amazing and sounds even more amazing when paired with the incredible Earthworks Sigma monitors he uses. I honestly don’t think I’ve ever heard a better sounding system than this one.

Now it’s time to finish up the album. I really can’t wait for the day I get to drive back out there, it’s always like a celebration for me at the end of the months spent in the studio slaving away on the music. You get to hand it over and then watch it become complete. If you’re in the market for mastering — which any self-respecting musician should be — definitely check out Eric at Monsterlab, he does incredible work at very reasonable rates. And if you’re not in Northern California I know he can do the work remotely as we did a couple sessions that way. Monsterlab Audio