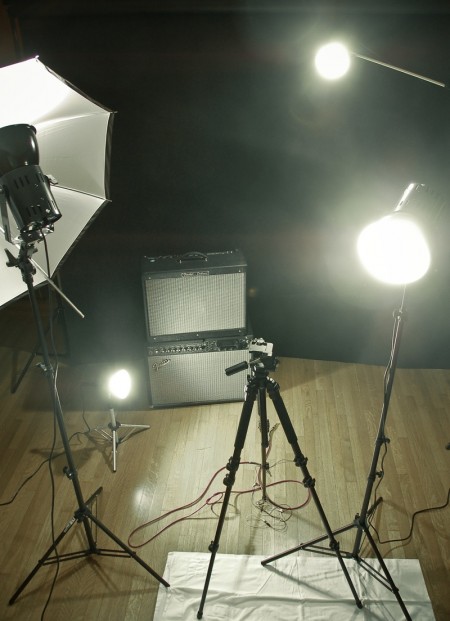
We’ve written before about photographic lighting. Another lighting arena that I’ve recently explored is continuous lighting for video. As I had absolutely no idea what I was doing when I jumped into this, I decided to start with a basic kit set up, and then go from there. I had researched enough to know that I would need at least three lights, but I was fuzzy on just about every other detail. I ended up going with the Smith Victor K84 Photoflood Kit. (Four lights: two A80 flood lights and two, smaller A5s.)
Now to this point, the kit has satisfied my requirements. I haven’t felt like I needed any additional lights on my projects and everything is lit well and looks (more) professional. That said, I have learned a lot in the process about what not to do.
First, these lights get unimaginably hot when they’re on for an extended period of time (more than 5 minutes). I use them in an enclosed room without a lot of ventilation and it can become unbearable really quickly. If you are interviewing someone, or performing under these lights, you need to either get things done fast, or have some way of cooling down your room. I broke a sweat just snapping the above picture, and they had only been on for 10 minutes.
Second, despite the benefits of using continuous lighting for photography (no camera syncing necessary, always see where you’re lighting etc), this kit is not powerful enough to really work in this regard. Unless the lights are right up on your subject, you’ll have to adjust the shutter speed significantly to get satisfactory results. It’s also impossible to get good portrait shots, mainly because your iris gets smaller as it gets used to the continuous amount of light; doesn’t look as cool as strobe. It works for some photo things, but I am mainly attempting to use this kit for lighting video. So far the footage has required a significant amount of color correction to make things look natural. The kit is a tungsten set up, which burns yellow/orange, and that is the color of the footage upon capture. Luckily I’ve been working a lot with Color and have been able to work around this.
The biggest positive to the kit is that it’s cheap (relatively). It helps to know some basic lighting strategy (three point etc), but the kit really doesn’t require much know-how to get up and running. It is a great starter kit and I feel like I have a much better idea of what I need, now that I have fumbled my way around with this one. Of course it will be a while before I can afford a real set up, but in the mean time I am having a good time experimenting and making mistakes. This probably wasn’t the kit of me at the end of the day, but it sure beats lighting things with assorted desk lamps and flash lights.


oooo, incandescent continuous lighting will definitely get very hot. I would recommend next time, looking into fluorescent if you are shooting video. Kino Flo makes some really great stuff, and they even start affordably: http://bit.ly/wDaPB
are you sure you’re white balancing properly? is this film or digital video/photo you’re shooting? you should be able to balance properly for tungsten lights very easily.
d- Yeah, with my camera it doesn’t do a very good job on board (as it’s a consumer camcorder) but once I get it into Color, I can clean it up very quickly. A better camera would probably have no issue.
lighting is a lot of fun. Strobes are the way to go for photo, but on occasion I like to build my own odd set ups (ring lights, walls of light, softboxes). One cheap set I still find myself using is florescent shop lights. And it’s 20 dollars kinda cheap. I like the look; and you can build shapes and lines in the iris.
right light should be place in the right place